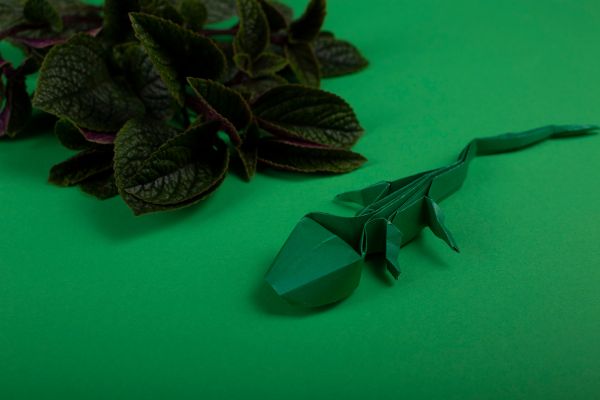
Origami is a captivating art form that has been practiced for centuries, originating in Japan. It involves the delicate and precise folding of paper to create intricate and beautiful designs. Whether you’re a beginner or an experienced folder, mastering essential folding techniques is key to creating stunning origami creations. In this article, we will explore seven essential folding techniques in origami that will expand your repertoire and enhance your skills. By understanding and practicing these techniques, you’ll unlock a world of creativity and bring your origami creations to life.
1: Valley and Mountain Folds
The valley and mountain folds are fundamental techniques in origami. A valley fold is created by folding the paper towards you, while a mountain fold is made by folding the paper away from you. These folds are the building blocks for many origami models and form the basis for more intricate designs. Mastering the valley and mountain folds will allow you to create crisp, precise creases that provide the foundation for your origami creations.
To execute a valley fold, first, place the paper with the desired side facing up. Fold the paper in half vertically, creasing it firmly. Unfold the paper, and then fold the left and right edges towards the center crease, aligning them precisely. Press down to create a sharp valley fold. Practice these folds with different types of paper to achieve consistent results.
Mountain folds follow a similar process but involve folding the paper away from you. Start with the desired side facing up and fold the paper in half vertically. Unfold the paper and then fold the left and right edges away from the center crease. Apply pressure to create a defined mountain fold. Practicing these folds will improve your precision and control over the paper.
2: Squash and Inside Reverse Folds
The squash fold and inside reverse fold are techniques used to manipulate the paper and create three-dimensional shapes in origami. These folds allow you to expand, flatten, or tuck paper layers to achieve desired forms and add depth to your origami models.
The squash fold involves flattening a section of the paper, creating a wide surface. To execute a squash fold, start with a valley or mountain fold as the base. Then, carefully manipulate the layers of the paper, opening it up and pressing it flat. This technique is often used to create petals, wings, or other broad surfaces in origami designs.
The inside reverse fold, on the other hand, involves tucking a flap of paper inside the model, reversing its direction. To perform an inside reverse fold, start with a mountain or valley fold. Then, carefully lift a flap of paper, unfold it, and tuck it back into the model, reversing its orientation. This technique is commonly used to create limbs, beaks, or other intricate details in origami models.
3: Sink and Pleat Folds
Sink and pleat folds are techniques used to compress and manipulate paper layers, creating intricate and decorative patterns in origami. These folds are often employed in designs that require multiple layers of paper to be merged or tucked into specific formations.
The sink fold involves folding a portion of the paper inward, creating a tucked-in effect. Start with a mountain or valley fold as the base. Then, lift a layer of paper and carefully fold it inward, aligning the edges with the existing creases. Press down firmly to create a sink fold. This technique is commonly used in origami models to create pockets or compartments.
Pleat folds, on the other hand, involve creating a series of parallel folds in the paper. Start with a valley or mountain fold as the base. Then, make multiple evenly spaced folds along the length of the paper, creating a pleated effect. This technique is often used to add texture, depth, or decorative elements to origami designs.
4: Swivel and Outside Reverse Folds
The swivel fold and outside reverse fold are techniques that allow you to rotate or change the direction of a paper segment, enabling the creation of more intricate and dynamic origami models. These folds add movement and visual interest to your designs.
The swivel fold involves rotating a portion of the paper around a pivot point. Start with a mountain or valley fold as the base. Then, carefully lift a segment of the paper, rotate it, and bring it back down, aligning the edges with the existing creases. This technique is often used to create limbs, joints, or other movable parts in origami models.
The outside reverse fold, on the other hand, involves reversing the direction of a flap of paper by folding it outside the model. Start with a mountain or valley fold as the base. Then, lift a flap of paper, unfold it, and fold it back outside the model, reversing its orientation. This technique is commonly used to create limbs, tails, or other extended elements in origami designs.
5: Crimp and Rabbit Ear Folds
The crimp fold and rabbit ear fold are techniques used to create intricate and detailed features in origami designs. These folds involve precise manipulation of the paper to achieve specific shapes and forms.
The crimp fold creates a small pleat or pinch in the paper, adding texture and dimension to your origami models. Start with a valley or mountain fold as the base. Then, carefully pinch a small section of the paper between your fingers and fold it inward, creating a crimped effect. This technique is often used to create scales, feathers, or other intricate details in origami designs.
The rabbit ear fold involves folding a flap of paper to create a triangular shape, resembling a rabbit’s ear. Start with a mountain or valley fold as the base. Then, carefully lift a flap of paper, fold it diagonally, and flatten it, creating a triangular shape. This technique is commonly used to create ears, petals, or other pointed elements in origami models.
6: Preliminary and Waterbomb Bases
The preliminary and waterbomb bases are fundamental folding techniques that serve as the starting point for many origami models. These bases provide a solid foundation for various designs and allow for the efficient use of paper.
The preliminary base is a square base that serves as the starting point for numerous origami models. Start with a square piece of paper and follow a series of folds to create a base that can be further manipulated to form a variety of shapes and figures.
The waterbomb base, also known as the balloon base, is a versatile base used to create models with a three-dimensional shape. It involves folding the paper into a square base and then performing additional folds to transform it into a waterbomb shape.
7: Modular Origami and Unit Folding
Modular origami involves creating complex structures by folding multiple units of paper and assembling them together. This technique allows for the creation of intricate and visually striking origami models. Each unit is folded individually, and then the units are interlocked or connected to form a larger structure.
Unit folding, also known as tessellation folding, involves creating repetitive geometric patterns by folding and repeating a single unit of paper. These patterns can be used as decorative elements or as the basis for more elaborate origami designs.
Conclusion
Mastering these essential folding techniques in origami will elevate your skills and expand your creative possibilities. The valley and mountain folds, squash and inside reverse folds, sink and pleat folds, swivel and outside reverse folds, crimp and rabbit ear folds, preliminary and waterbomb bases, and modular origami and unit folding techniques will empower you to create intricate, dynamic, and visually stunning origami models. Embrace the art of origami, practice these essential folding techniques, and let your creativity take flight as you bring intricate paper creations to life.